Pen Pressure in Brush Lettering: Thick Downstrokes, Thin Upstrokes
How to control a brush pen: the single pressure rule, the low pen angle that makes it work, four practice strokes and a wave drill for smooth transitions.
Lesson at a glance
What you need
- Small firm-tip brush pen
- Smooth paper
- HB pencil
- Ruler
- Scrap sheet to rest your hand on
A first brush pen often produces one of two results: strokes that are all equally fat, or thin lines that shake. Both come from the same place. Brush lettering pressure is a skill of the hand, not a feature of the pen, and it has to be learned as deliberately as the letter shapes.
The good news is that the whole skill rests on a single rule, and you can practice it with simple strokes before you write a single word.
The one rule: press down, lighten up
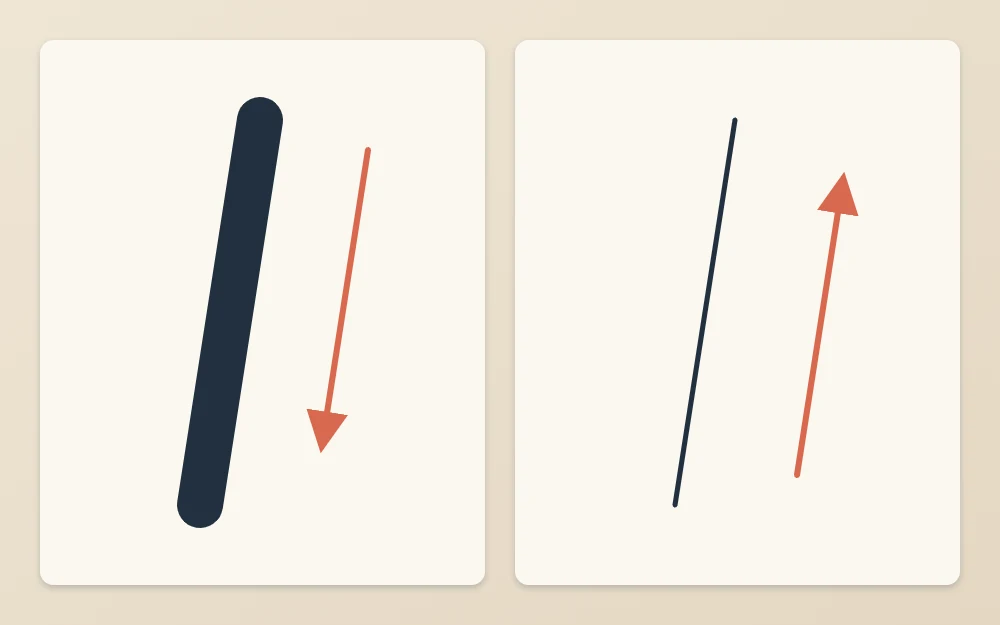
When the pen travels down the page, toward you, press so the flexible tip bends and spreads. That makes a thick downstroke. When the pen travels up the page, away from you, lighten until only the very point touches. That makes a thin upstroke.
Every letter in brush lettering is a mix of those two movements. The contrast between them is what gives the style its look.
This only works with a flexible tip
Pressure changes line width only when the tip can bend. Brush pens and water brushes have that kind of tip. Fineliners, gel pens, bullet-tip markers and pencils do not: they make one line weight however hard you press, and pressing harder only damages the tip or dents the paper.
If you want the thick-and-thin look with a one-weight pen, you draw the thick strokes instead of pressing them. That method is covered in the tutorial on faux calligraphy, and it is a sound way to learn where the thick strokes belong.
What you need
- A small firm-tip brush pen
- Smooth printer paper, marker paper or a smooth dot grid pad
- HB pencil and ruler for guide lines
Begin with a small firm tip. It bends only a little, so it forgives uneven pressure and springs back quickly. A large soft tip gives dramatic contrast, but it reacts to every tremor and is much harder to keep thin. Move to one after the firm tip feels predictable. The guide to hand lettering pens compares the tip types in more detail.
How to hold the pen
Hold the pen lower than you would for handwriting, so the barrel leans back at roughly 45 degrees to the paper. At that angle the side of the tip, not the point, meets the page when you press, and the tip can spread into a wide stroke.
Three things to check:
- Your grip sits about 1 in (2.5 cm) back from the tip, relaxed enough that someone could slide the pen out of your fingers.
- The barrel points toward your shoulder, not straight up at the ceiling.
- The side of your hand rests on the paper and glides with the stroke.
Common mistake
Holding the brush pen upright like a ballpoint. Pressing on an upright tip crushes the point straight down, gives a blunt, ragged stroke and wears the tip out quickly.
Four practice strokes for pressure
Rule guide lines about 3/4 in (2 cm) apart so the strokes are large enough to show what the tip is doing. Go slowly; these are drawn, not written.
- Downstrokes. Start at the top line, press, and pull straight down to the baseline at an even weight. Lift cleanly. Draw a full row and check that every stroke is the same width from top to bottom.
- Upstrokes. Start at the baseline and push up with only the point touching. Aim for a line as thin as the pen allows. A slight wobble is normal at first; a slightly quicker stroke usually steadies it.
- Underturns. Press down, begin releasing just before the baseline, curve through the bottom and rise thin. The shape looks like a “u”.
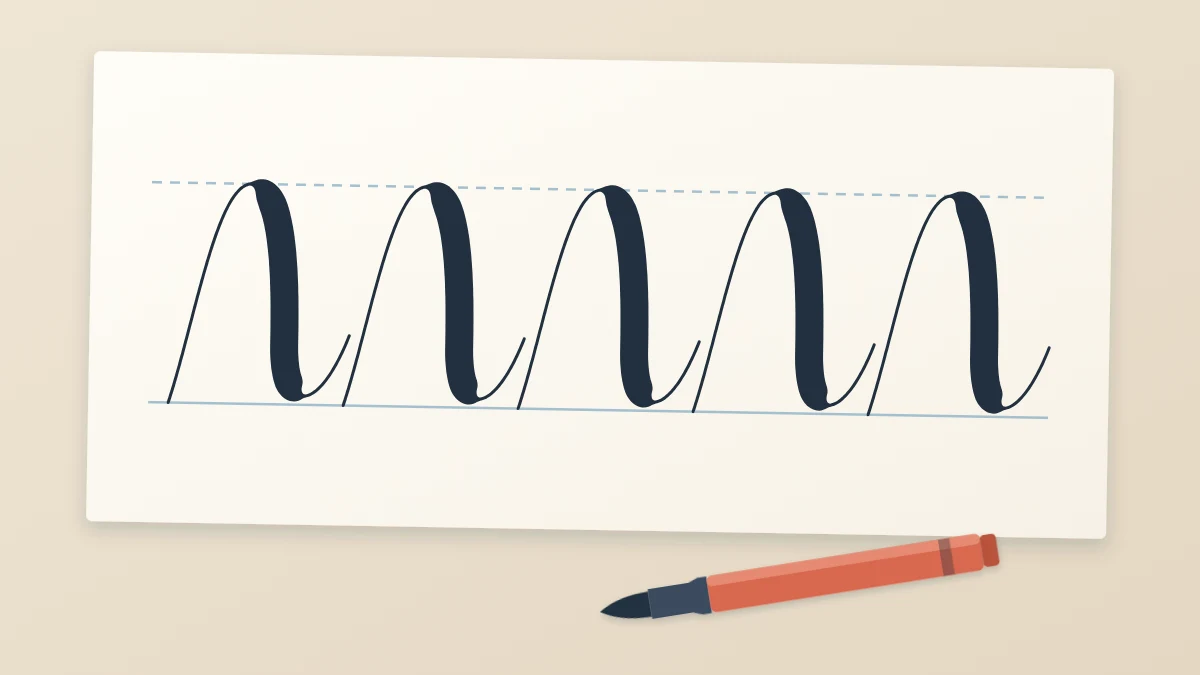
- Overturns. Rise thin, curve over the top, and begin pressing once the pen is clearly heading down. The shape looks like an “n” without its first stem.
After each row, look for the weakest stroke and repeat that one. These shapes belong to the eight strokes that all the lowercase letters are assembled from; the full set is explained in the guide to basic lettering strokes.
Slow down at the transitions
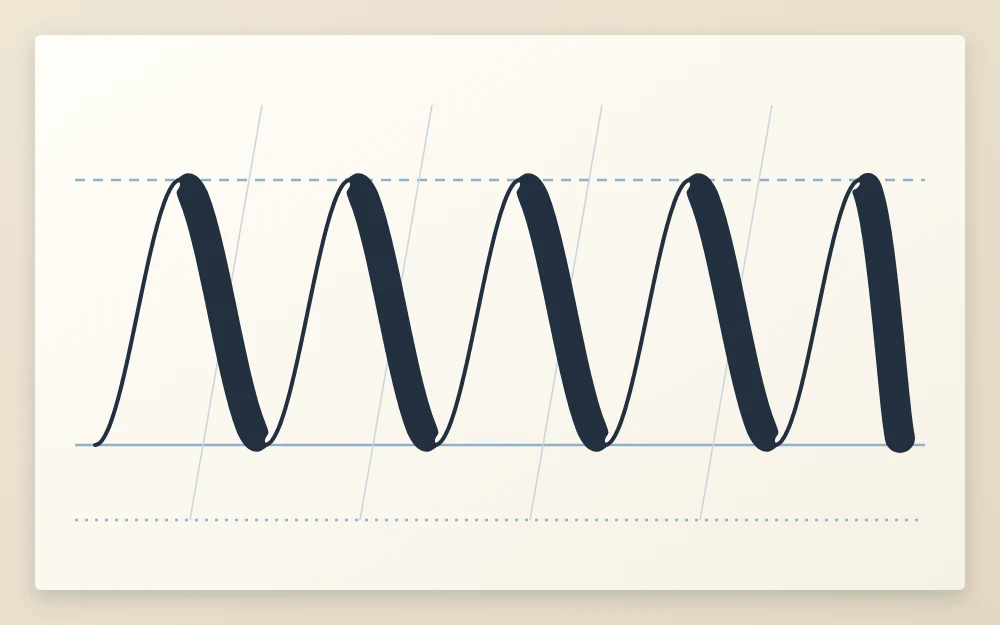
Most trouble happens at the top and bottom of curves, where thick turns into thin or thin into thick. The change has to be gradual. If you release all the pressure at once, the stroke shows a sudden step; if you release too late, the thick part drags around the curve and the upstroke starts heavy.
Think of pressure as a dimmer, not a switch. Start easing off shortly before the turn, be at your lightest as the pen begins to rise, and add pressure again only once the pen is traveling downward.
A continuous wave is the best drill for this. Draw a row of joined overturns and underturns without lifting, thin on every rise and thick on every fall, counting slowly as you go.
Tip
If every stroke comes out thick, practice the upstroke on its own with the pen barely touching, as if the paper were hot. If thin strokes shake, plant the side of your hand and move the whole forearm.
For left-handed letterers the rule is the same, but a left hand often pushes strokes that a right hand pulls. Turning the paper clockwise can make downstrokes easier to pull. Place a scrap sheet under your hand so you do not drag through wet ink.
Looking after the tip
A brush tip frays when it is dragged over rough fibers, and a frayed tip can no longer make a clean thin line. A few habits help it last:
- Use smooth paper. Textured or toothy paper acts like fine sandpaper on a felt tip.
- Press firmly but never grind. The tip should bend, not flatten against the page.
- Do not scrub back and forth to fill an area; lay strokes side by side instead.
- Cap the pen as soon as you finish and store it flat.
A short routine to repeat
Fill one row each of downstrokes, upstrokes, underturns and overturns, then two rows of the wave. That takes roughly ten to fifteen minutes. Then write one short word such as “minimum” and compare its thick and thin strokes with your drill rows.
To vary the routine, change the size of your guide lines. Control builds gradually over many short sessions, so judge progress by comparing this week’s page with one from a few weeks ago.
Frequently asked questions
Why are all my brush pen strokes thick?
Usually the pen is being held too upright or the hand never fully releases. Lower the barrel so it leans back, then practice upstrokes alone with only the point grazing the paper. A small firm-tip brush pen makes this much easier than a large soft one while you are learning.
How hard should I press on a brush pen?
Press only until the tip bends and the stroke reaches the width you want. The tip should flex, not flatten or splay. If the stroke edges look ragged or the paper dents, that is too much. Firm tips need a little more pressure than soft ones to reach full width.
Can I get thick and thin strokes by pressing harder with a regular pen?
No. Fineliners, gel pens, bullet-tip markers and pencils have rigid points that make one line weight. Pressing harder risks damaging the tip. To get contrast with those tools, draw a second line beside each downstroke and fill the gap, which is the faux calligraphy method.