Lettering Practice Drills: 10 Warm-Up Exercises for Steady Lines
Ten simple warm-up drills, from parallel downstrokes to rows of the word minimum, with what each one trains, how many rows to do and what to check.
Lesson at a glance
What you need
- HB or 2B pencil
- Fineliner or gel pen
- Small firm-tip brush pen (optional)
- Ruler
- Smooth paper
A cold hand draws shaky lines. A few minutes of simple, repeated shapes before you letter anything loosens the arm, settles your speed and reminds your eye what “even” looks like.
These ten lettering drills are ordered from single strokes to connected shapes to a whole word. You do not need all ten every time. Pick three or four, fill a row or two of each, and treat them as a warm-up, not a test.
What you need and how to set up
- An HB or 2B pencil, or any pen you want to practice with
- Smooth paper with guide lines: a baseline and an x-height line about 3/8 in (1 cm) apart
- A small firm-tip brush pen, only if you want to try drill 9
If ruling fresh lines every day sounds tedious, rule one sheet and reuse it. The guide to making your own practice sheets shows how. Sit so your forearm rests on the table, and move from the arm instead of only the fingers.
Drills 1 to 3: single strokes
1. Parallel downstrokes
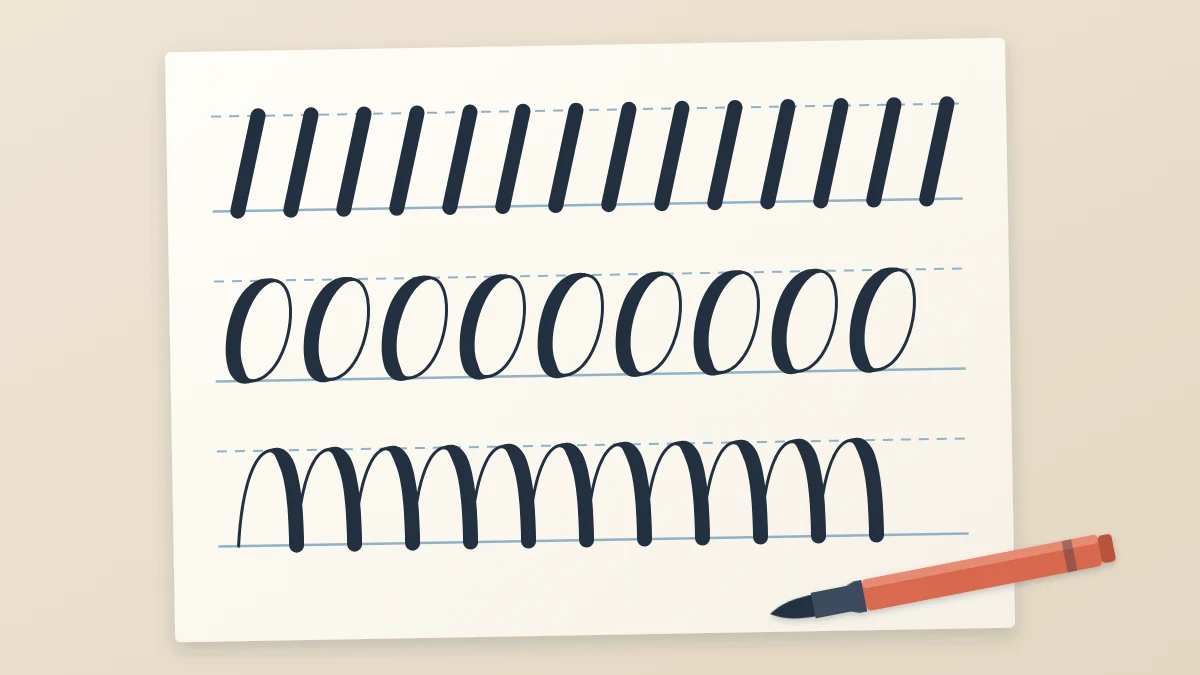
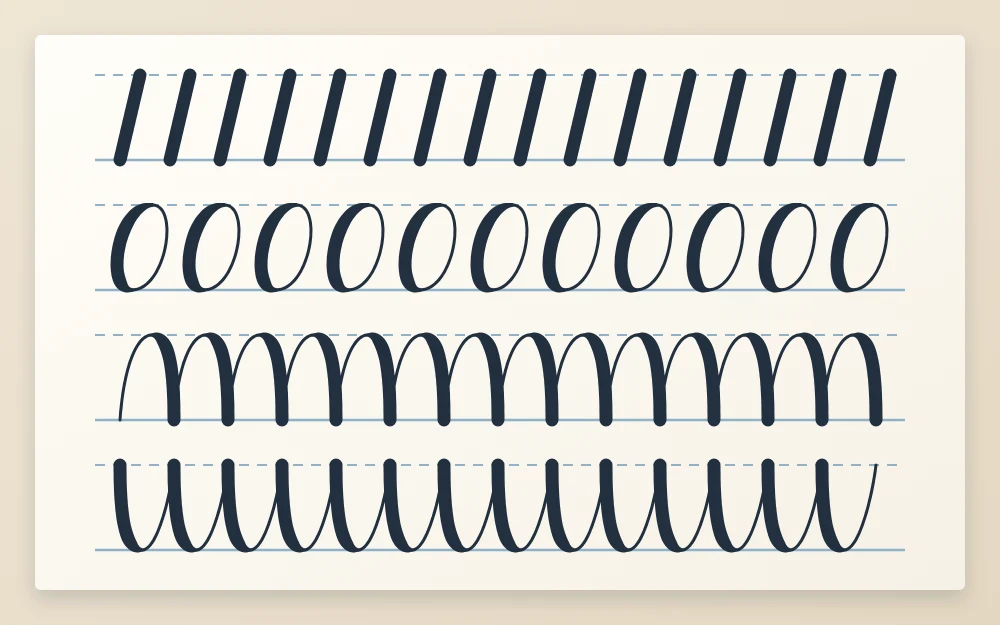
Start at the x-height line and pull a straight line down to the baseline. Repeat across the row, upright or on one slant. This trains even height, even slant and even gaps, which is most of what makes a word look tidy. Check that the lines are parallel and that the gaps between them match.
2. Upstrokes
Start on the baseline and push a line up to the x-height line on a slight slant. Pushing a pen away from you is harder to control than pulling it, so this row will look rougher at first. It trains a light, steady touch.
3. A row of ovals
Start at about two o’clock, travel up and over to the left, down, around and close the shape where you began. Fill the row with ovals that touch both lines. This trains the round shape inside a, d, g, o and q. Look for ovals of one width that all lean the same way and close without a flat spot.
Drills 4 to 6: connected shapes
4. Connected arches
Without lifting the pen, draw a row of arches like a long line of the letter “m”: up, over, straight down, and back up along the stroke you just made. This trains the overturn and keeps your downstrokes parallel while the pen is moving.
5. Connected cups
The mirror image, like a long line of the letter “u”: down, curve along the baseline, up, then straight down again. This trains the underturn. Check that every cup has a rounded base of one width.
6. Alternating arch and cup
One arch, then one cup, then an arch again, across the whole row. The change of direction happens at a different place each time, which trains you to control curves instead of repeating them on autopilot.
If any of these shapes is new to you, the guide to the eight basic lettering strokes describes each one and the letters it builds.
Drills 7 and 8: flow and rhythm
7. Figure eights
Draw a figure eight lying on its side, about twice as wide as it is tall, and keep tracing around it several times before moving along the row. The line crosses itself in the middle and curves both ways, so this trains smooth changes of direction and a relaxed grip. Aim for two loops of equal size.
8. A line of “minimum”
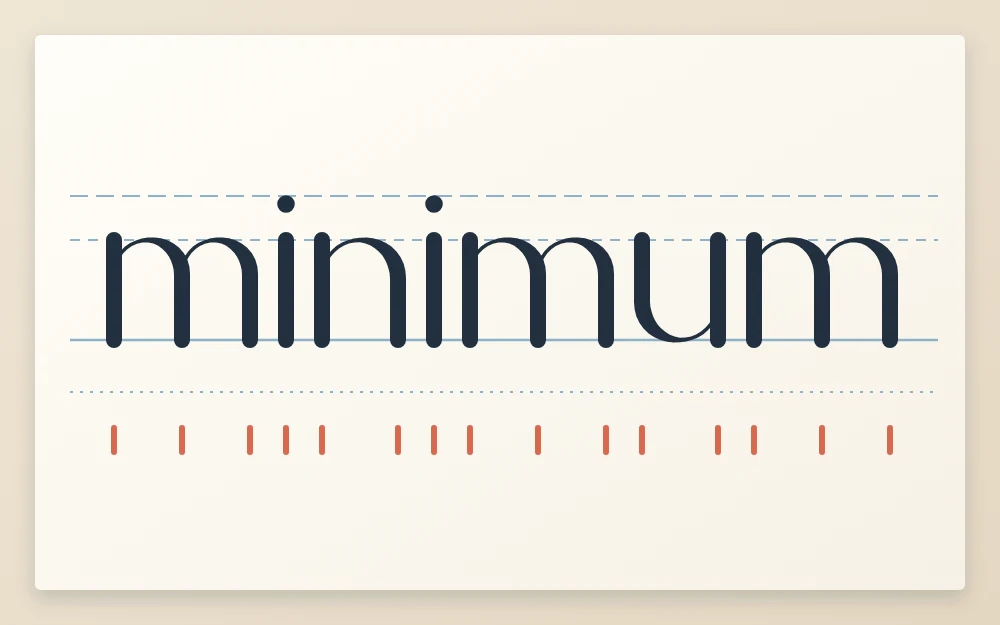
Write the word “minimum” across the row, again and again. It is made almost entirely of short downstrokes joined by arches and cups, with no tall or hanging letters to distract you. It trains rhythm: every downstroke one height, one slant and one distance from the next.
Tip
Turn a finished row of “minimum” upside down. With the word unreadable, you see only a fence of strokes, and the one that leans or crowds stands out.
Drill 9: pressure on and off (brush pens only)
This drill works only with a flexible tip, such as a brush pen or a water brush. A pencil, fineliner or gel pen makes one line weight whatever you do, so skip it with those tools.
Draw a continuous zigzag wave across the row. Press on every stroke that travels down, so the tip spreads and the line turns thick. Lighten until only the point touches on every stroke that travels up, so the line turns thin. Slow down at each turn; the change in pressure should finish before the direction changes. Check that the thick strokes share one width and the thin ones stay thin.
Drill 10: spacing rows
Draw a downstroke, an oval, a downstroke, an oval across the row, then two downstrokes followed by two ovals. Your aim is for the white space between each pair of shapes to look equal in area, which means round shapes sit closer together than straight ones. This trains your eye more than your hand.
How many rows, and what to look for
One or two rows of each drill you choose is plenty for a warm-up. More than that and attention fades, so the last rows are often worse than the first. After each row, pause and check three things:
- Height. Does every shape touch both guide lines?
- Slant. Do the downstrokes lean at one angle?
- Gaps. Does the white space look even along the row?
Circle the best shape in the row with your pencil.
Left-handed? Work each row from right to left when the ink is slow to dry, or rest your hand on a scrap sheet so it does not drag through wet strokes.
Common mistake
Rushing to fill the page. A drill done fast only practices speed. Work at a medium pace, slow enough to steer the line and quick enough that it does not wobble.
When to move on
Move from one drill to the next when most of a row looks alike, not when it looks perfect. A reasonable sign is that you can spot your own weakest shape without help.
Drills do not replace letters and words. Use them for the first few minutes, then letter something real; a short daily practice routine shows one way to divide the time. Steadier lines come gradually, and the change is easier to see across weeks of pages than from one day to the next.
Frequently asked questions
How long should I spend on drills before lettering?
A few minutes is usually enough: roughly three to five for a short session. The aim is to loosen your arm and settle your pace, not to fill pages. If the drills take over the whole session, cut back to three of them and spend the remaining time on letters and words.
Can I do lettering drills with a normal pen or pencil?
Yes. Nine of the ten drills work with any tool, because they train height, slant, shape and spacing. Only the pressure drill needs a flexible tip such as a brush pen, since an ordinary pen or pencil cannot change its line weight. A pencil is a forgiving place to start.
Why are my drill lines still shaky?
The usual causes are drawing too slowly, gripping the pen tightly, or moving only the fingers. Try a medium, even pace, loosen your hold, and let the forearm slide across the table. Some wobble is normal for a long while and tends to fade gradually with regular short sessions.